|
TX-Deck
|
 |
« Reply #30 on: February 18, 2005, 04:07:24 pm » |
|
/me holds credit card in hand....SOOOO tempting, but I better keep on trucking with the Berkut first....Nice Work, I want VIDEO soon!TX-Deck out.
|
|
|
|
|
 Logged
|
TX-Deck out.
|
|
|
|
TX-EcoDragon
|
|
« Reply #31 on: February 19, 2005, 12:54:00 am » |
|
Yeah Deck. . . you don't want to get sidtracked!!! Then again it's nice to have something to keep you having fun while you work away at that Berkut. Of course you've got the PT-40 for that I guess. . .that Berkut is not really an ideal second aircraft, it will probably be a bit of a challenge so getting lots of stick time on thw PT before you fly that is a wise idea!  Well, I picked up some silver spray enamel today, which I will add lightly over the blue canopy, which I will do tonight. Right now the fuse is outside with the lower blue stripe in progress, when those two things are done all the painting tasks are done, then I just need to install the components of the airframe, the radio and engien gear, which shouldn't take too long. . . maiden flight should be tomorrow!!Here is the fuse just before the lower blue strip was applied. I tried a Testors gold paint marker for the gold on the fuse, I did the tailfeather gold trim and the pinstripe betweent he red and white freehand, it looks almost as good as the mask and paint method, but takes a lot less time to do.  Here is the Fuse witht he lower blue stripe and the second gold pinstripe completed.  Here are the parts for the carbon fiber gear assembly and mounting hardware. I sanded bevels onto the edges and painted the plywood portions blue to math the fuse where they mount. 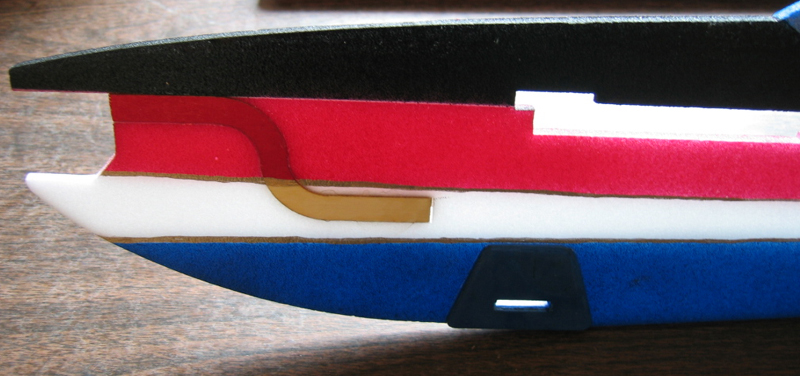 Here are the gear mounting plates installed and the hold is being cut for the gear to pass through. Post Maiden Edit: I would suggest adding some tape around the area of the ply mounts on the fuse, or perhaps a flat bar carbon rod on the bottom of the fuse in the area of the gear to distribute the loads over a greater area. |
|
|
|
|
Logged
|
S!
TX-EcoDragon
Black 1
|
|
|
|
TX-EcoDragon
|
|
« Reply #32 on: February 19, 2005, 07:48:20 pm » |
|
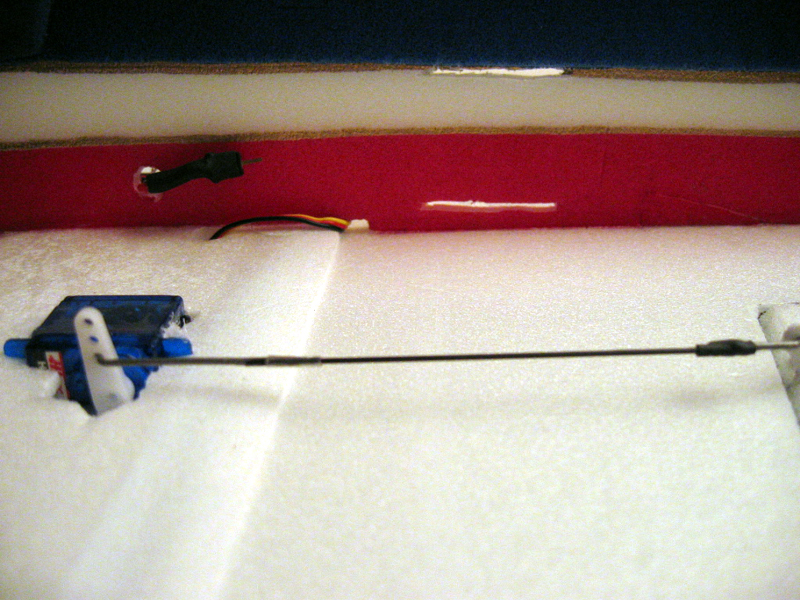
 There has been some instances of failure of the front mounted firewall system so I decided to try adding a groove to the underside of each siderail that I will lay a carbon fiber tube in. This will mount up to the firewall mount and the fuse with some epoxy, I hand cut this, it's not pretty, but it should get the job done. 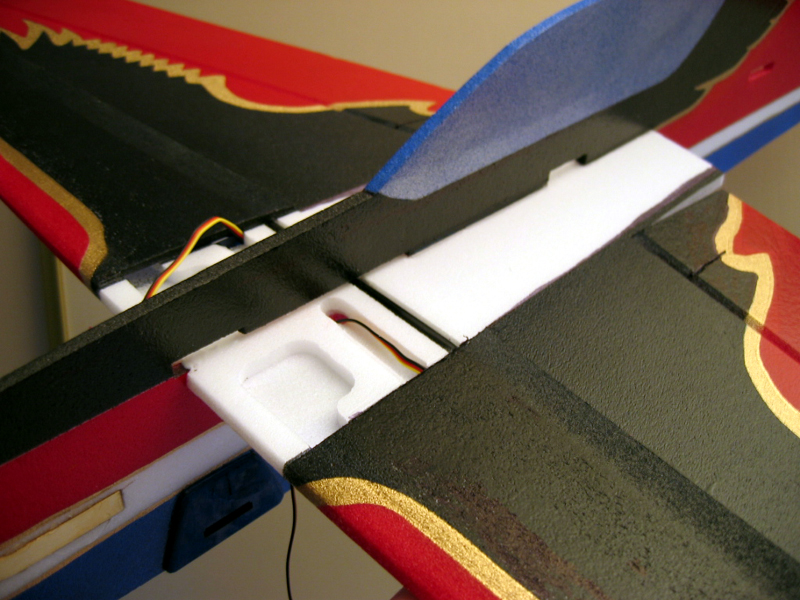 Next I installed the tail feathers and wing, this is easier and helps protect the paint if you fold some wax paper aroudn the wing as you feed it through the slit in the fuse. I used a straight edge and square to check alignment and glued using CA and kicker, with some small areas of canopy glue. Before moving on it is probably a good idea to install the aileron servos in the wing, as there is a handly internal tube for the wires but it will be covered by the side rails so be sure to do this before installing the side rails! You can see the servo wires that will be hidden away here.  Here is the aileron servo installed in the nice little craddle. Something I'd like to see improved on is the aileron linkage geometry. . . the pushrods run perfectly lengthwise on the aircraft while the aileron hing line is swept forward. The aileron servo cradles should be canted a few degrees and the precut slots for the control horns should be angled in so that they are 90 degrees to the hinge line. I have a few suggestions that I will compile after a few more flights to send to Levi at 3D Foamy.Next I installed the side rails, and once done with those the basic airframe is complete, the landing gear will need to be isntalled, then it's jsut engine and radio gear installation to complete it. BTW, the weather is nice and stormy today, so I am in no big rush. :-/Here are a few pics of the current state of assmbly. 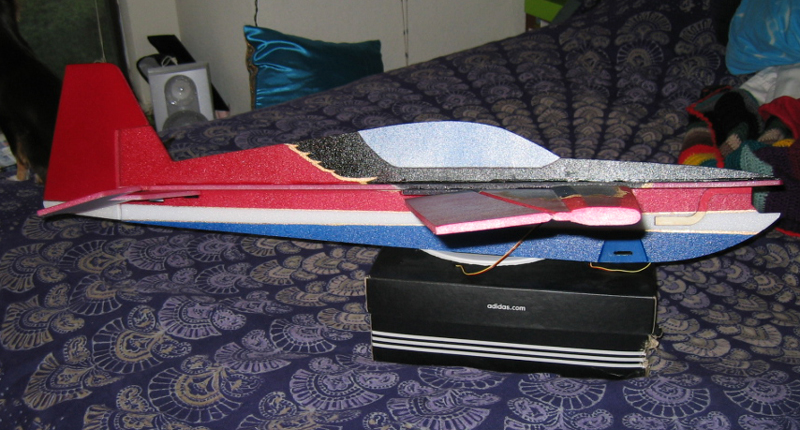 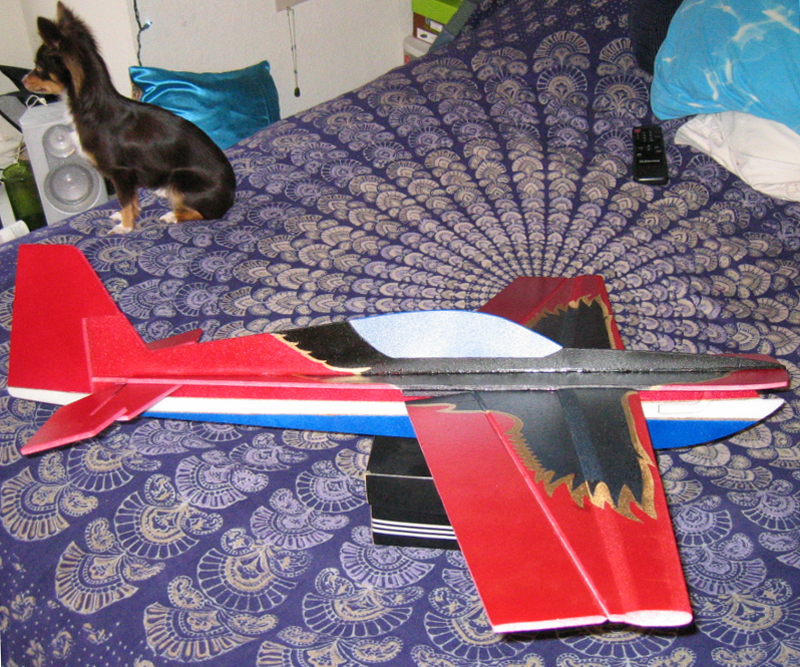 Stina's Chihuahua Ladybug insisted on being included in the pics. . . 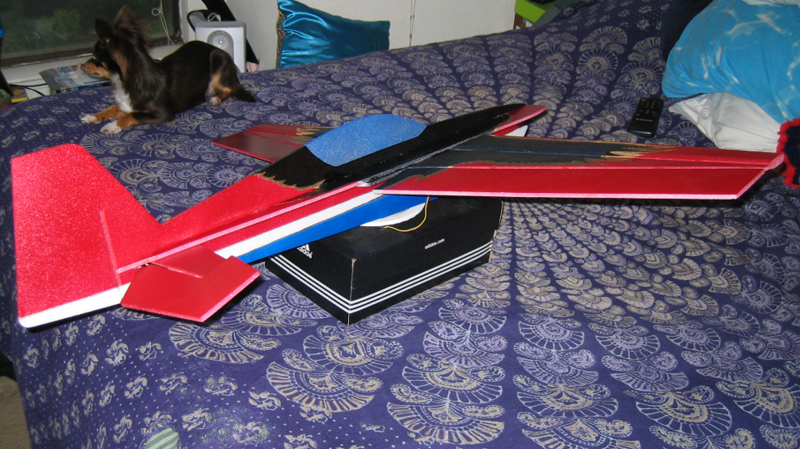   |
|
|
|
|
Logged
|
S!
TX-EcoDragon
Black 1
|
|
|
|
TX-CUDA
|
|
« Reply #33 on: February 19, 2005, 09:14:00 pm » |
|
....Eco, What's your dog looking at out the back door?....LOL.,...Good Dog, Good Dog...TX-CudaMinister of Information
|
|
|
|
|
Logged
|
|
|
|
|
TX-FlightRisk
|
|
« Reply #34 on: February 19, 2005, 09:40:32 pm » |
|
The plane is cool And you did an incredible job on it. LadyBug Rocks. Nice tri color Black and Tan!! You gotta like those lil dogs... I have two of them....S~TX-FlightRisk "If my plane is smoking it can mean one thing...I have been hit in one of my ass cheeks and I am cauterizing my wound....."
|
|
|
|
« Last Edit: February 19, 2005, 09:42:40 pm by TX-FlightRisk »
|
Logged
|
S~
TX-FlightRisk
"If my plane is smoking it can mean one thing...
Damn gremlins must be stowed away smoking CRACK again....."
|
|
|
|
TX-Deck
|
|
« Reply #35 on: February 19, 2005, 11:17:34 pm » |
|
The dog never moves... we need more pics to make sure it isn't "stuffed".Ok, that's a rather strange thought......nevermind.Great work on the Raven, still can't wait for Video!TX-Deck out.
|
|
|
|
|
Logged
|
TX-Deck out.
|
|
|
|
TX-EcoDragon
|
|
« Reply #36 on: February 20, 2005, 05:49:21 pm » |
|
There is a problem in the manual that has caused me some grief. The thing that makes it a little confusing is the wording in step 14 that states: "Slide the stab through the cutout. When centered push the stab forward into the centering notch." Well, it seems that that is wrong, the pictures depict the surface slid all the way back in the cutout, not forward. In the online manual pics it's clear from looking at them, but in my own printed copy it wasn't so I used the text more than the pics. I followed the text, and I didn't notice the issue until shortly after the glue had cured so I was faced with the option to try to cut the tail free and move it or fly it with the horizontal stabilizer and elevator halves 2/3 of an inch farther forward than they should be. . . the Raven already has a long tail moment, it should be fine, but wont be as easy to hover or rolling harriers. 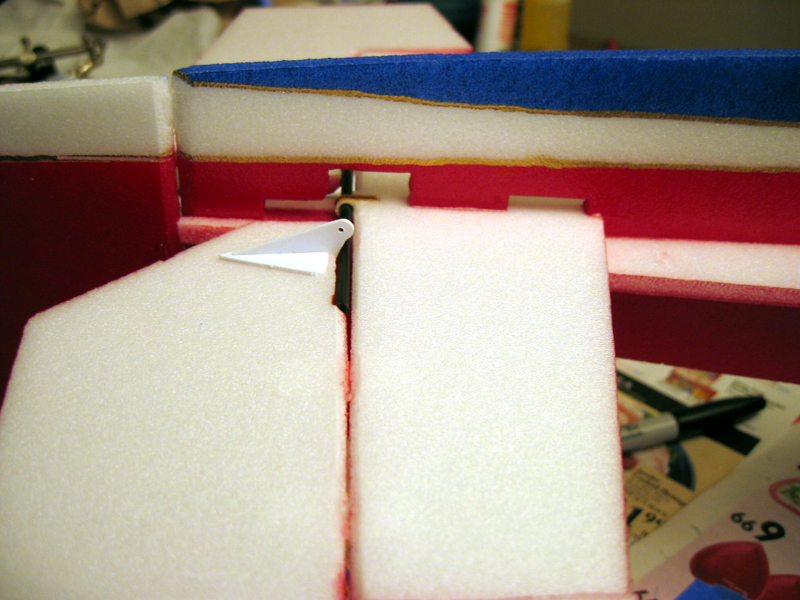 Here you can see the mistake I made, the space behind the black CF rod shouldn't be there. 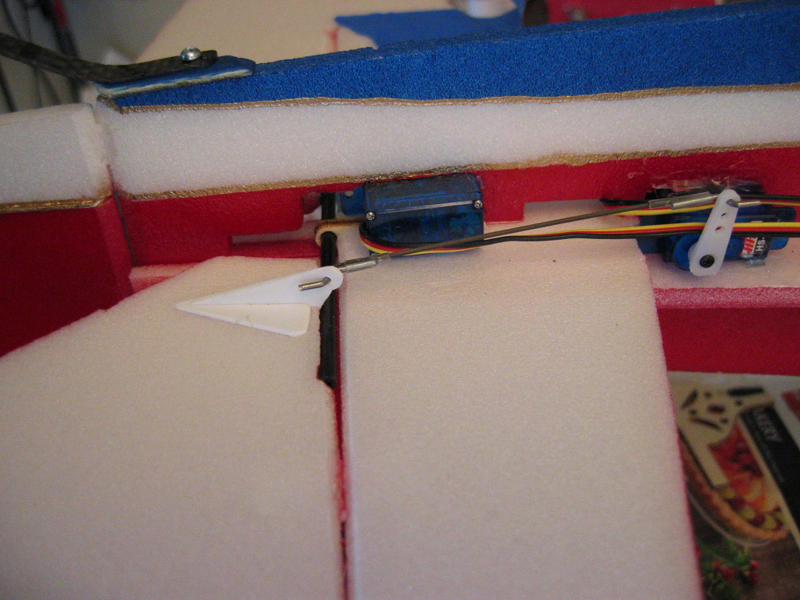 I had to cut the slots for the servos since the pre-cut ones couldn't be used after the goof up on the tail. Here is the completed installation including the carbon fiber tailskid, and the pushrods.  Here is a better shot of the CF tailskid. EDIT: I suggest adding heat shrink tubing to the tailskid at the tip of it to keep it from getting sanded down when taking off and landing on hard surfaces.This seems like the lightest, best looking, and most durable method. The carbon fiber itself WILL grind down very quickly otherwise. If you take off of concrete, do this! 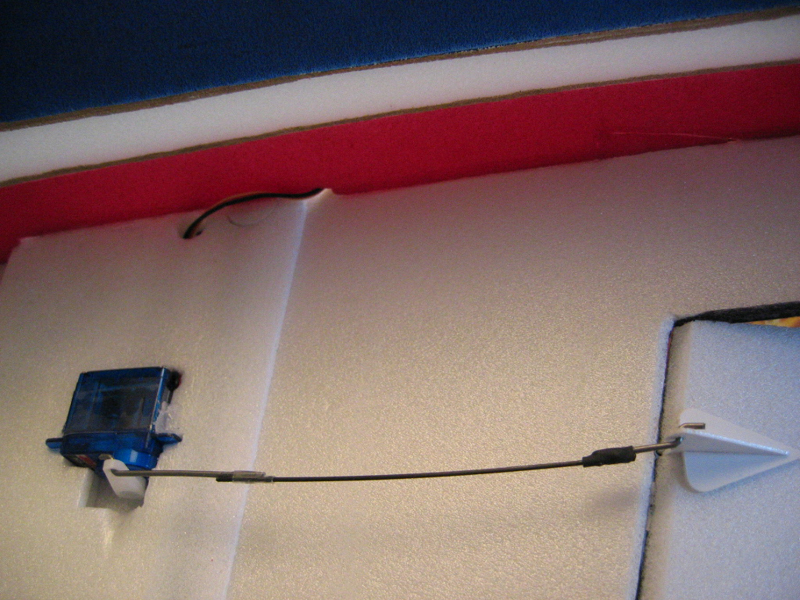 The supplied pushrod set up is too flexy for me to feel comfortable using them, I made all of them and installed them, but they are about half as strong as those that come on the shockflyer. . and those were too flexy too!I will probably replace these with the dubro micro pushrod system. This may be solved by using the full length of the Z-bent wire and cutting down the CF a bit more instead of vice versa. 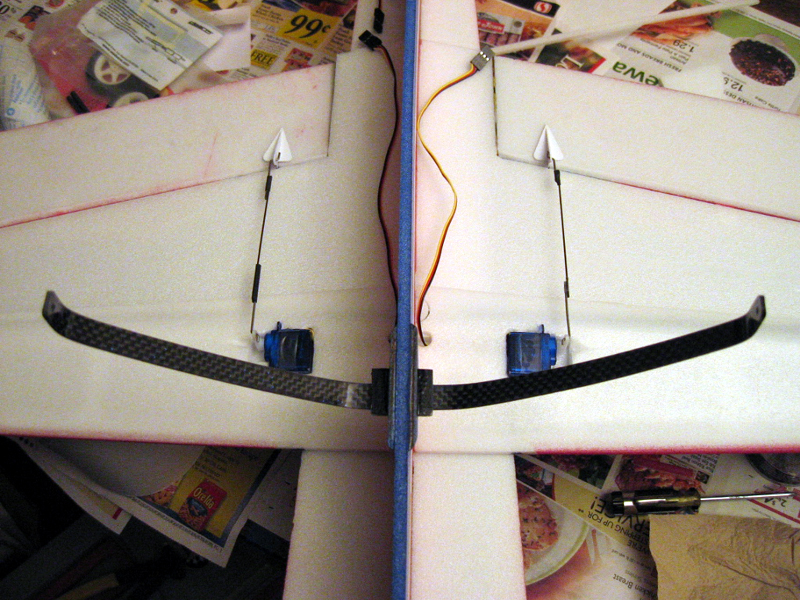 Here the gear are being assembled, In the above pic I am preparing to install the blind nuts and screws through the CF and balsa ply. the mounts are epoxied in place, I suggest doing the side plates first (just be sure they are lined up so the gear sit level), and once they are cured install the pass through plate of ply *and* CF gear legs and then add some epoxy to the pass through ply. In my installation the gear fit very tightly inside, there would have been no way to fit them through after fitting the ply side plates and pass through, at least without risking damage to the CF legs. 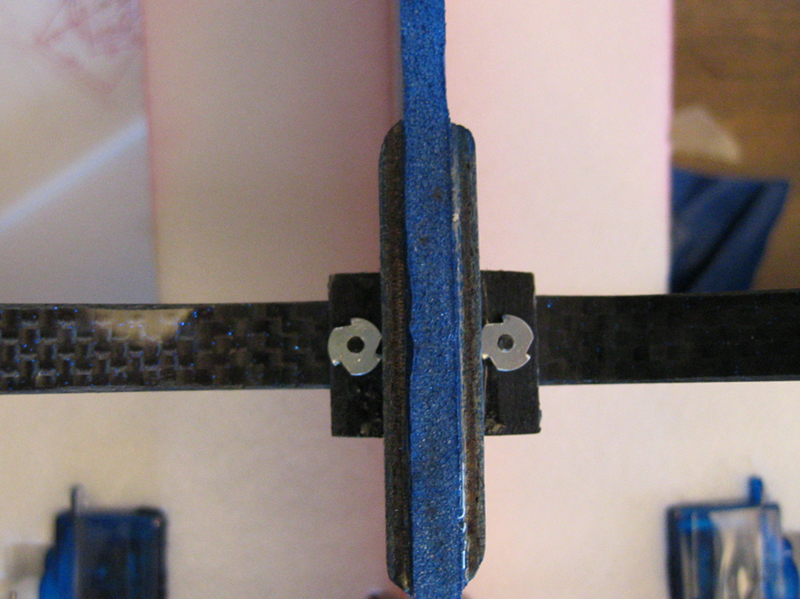 Here is the bottom of the gear mounting assembly once completed. 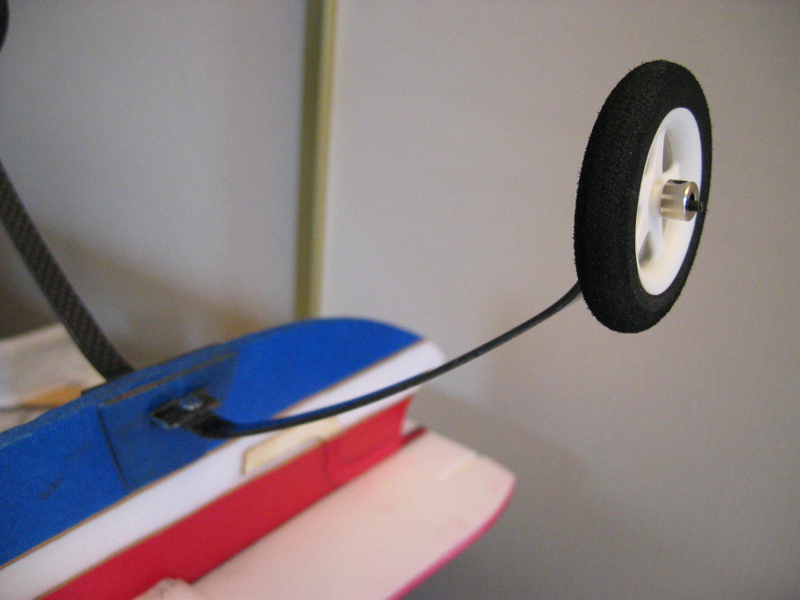 Thread the 2-56 screw and washer through the CF, isntall the nut, then the wheel, and lastly a 1/8 wheel collar to complete the gear and wheel installation. 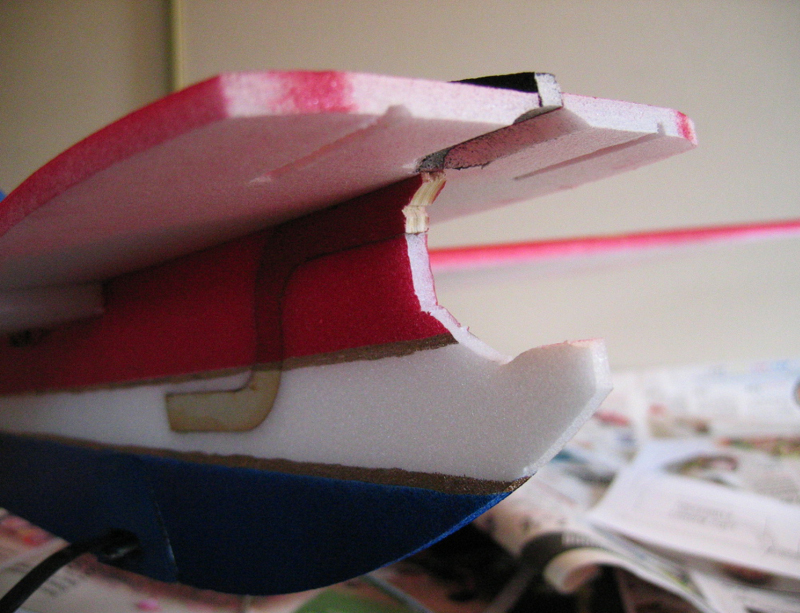 Well, my nice tidy cutouts needed to be redone since the front mount setup required some repositioning of things aft. This is before I sanded it down a bit to make it look a little smoother.  I also cut a pass through the "torqued" motor mount, through this I will place a small CF rod, my intention is to distribute the torque through the ply mount so it isn't all going into the fairly weak foam nose side rails. If using this mount system you should probably use a little tape over the mount and rails just as a precaution. . . and be sure to include this area on your pre-flight. 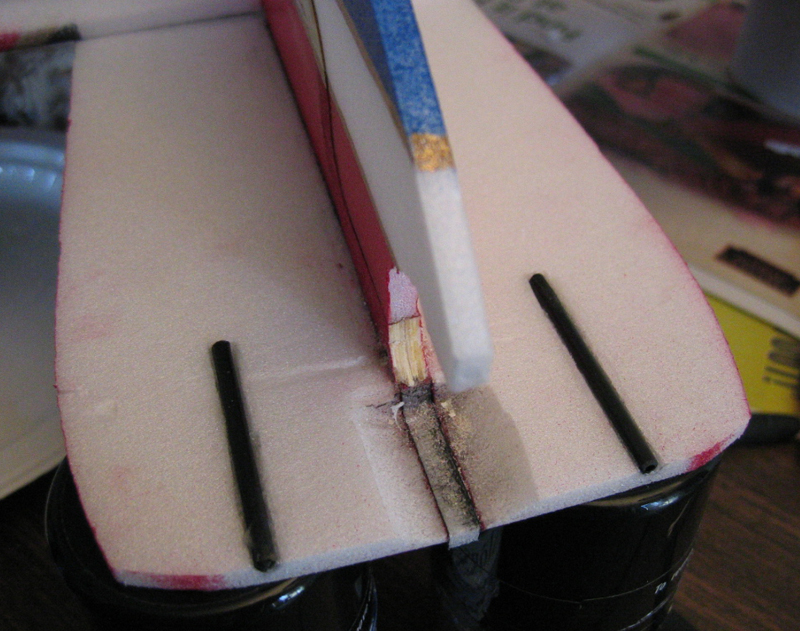 Here are the CF rods I installed to beef up the nose assembly. I used some 5 minute epoxy here. 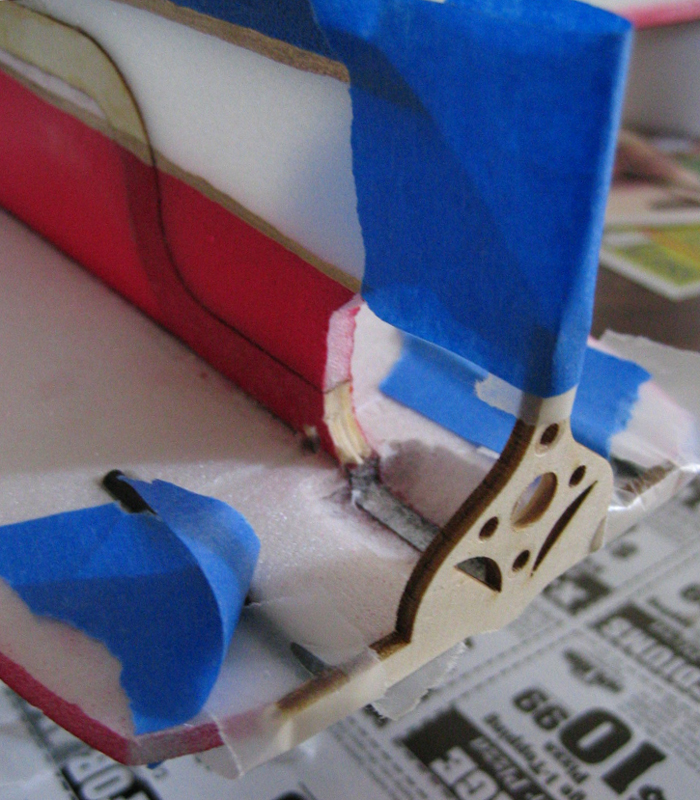 Here you see the installation of the firewall using 30 minute epoxy. |
|
|
|
|
Logged
|
S!
TX-EcoDragon
Black 1
|
|
|
|
TX-EcoDragon
|
|
« Reply #37 on: February 21, 2005, 02:35:43 am » |
|
|
|
|
|
|
Logged
|
S!
TX-EcoDragon
Black 1
|
|
|
|
TX-EcoDragon
|
|
« Reply #38 on: February 21, 2005, 05:31:00 pm » |
|
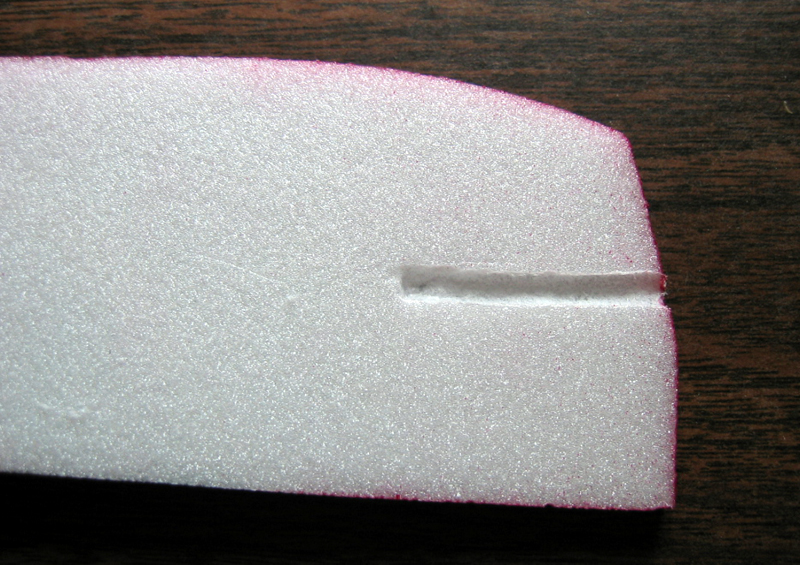
 After checking CG I verified this is the location for my battery I made two slots in the fuse for the included velcro strap to pass through. These should be oriented this way to permit shifting the pack fore and aft to shift CG as needed. 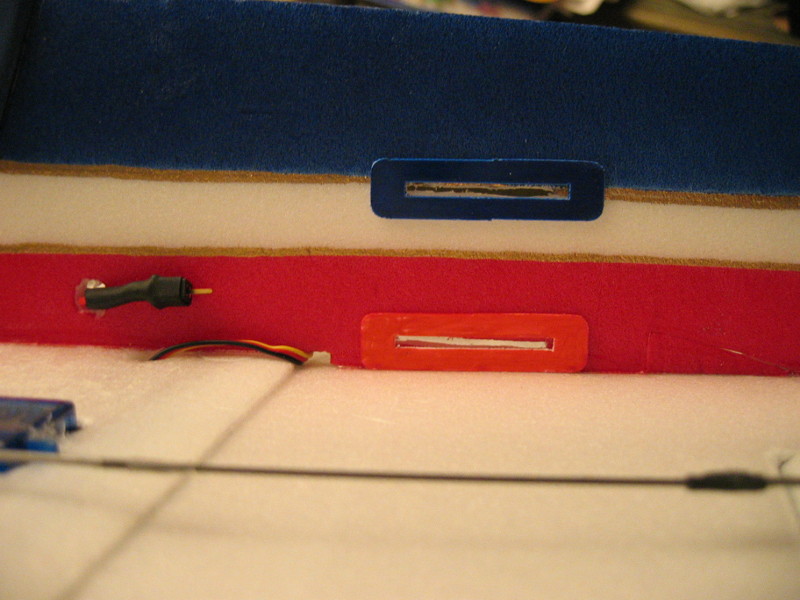 Next I used a little CA and kicker to apply the plastic doublers to each side of the fuse at the slots. These will keep the strap from cutting into the foam. 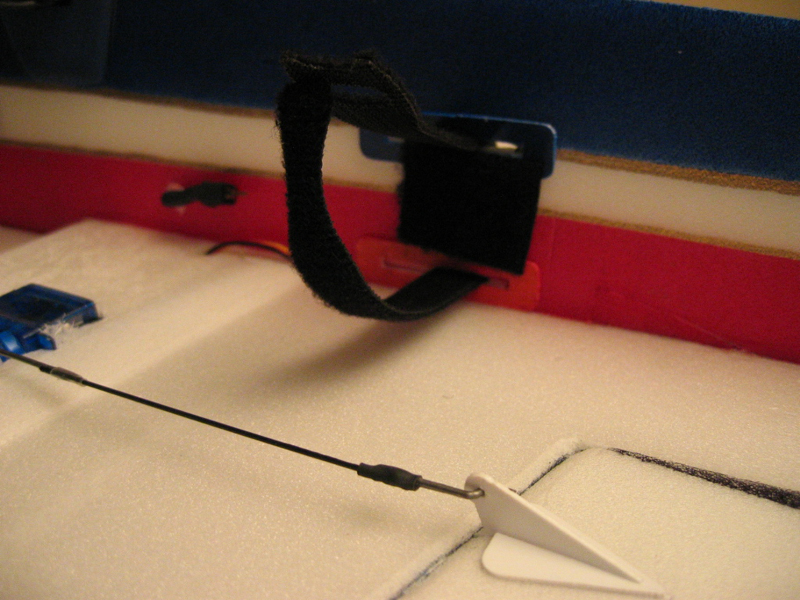 This is the velcro strap installed, as well as some velcro that will prevent the pack from sliding forward or backwards in the strap. 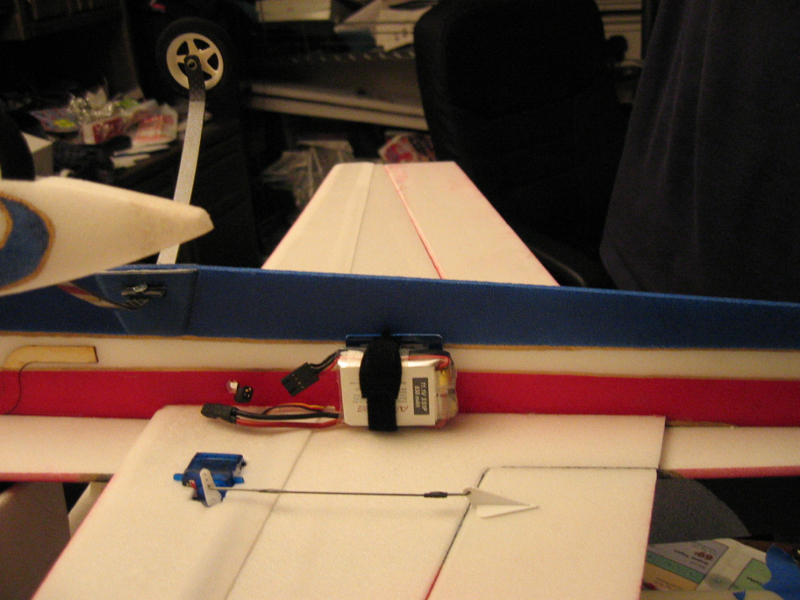 Here is one of the batteries installed (corresponding velcro on the back). 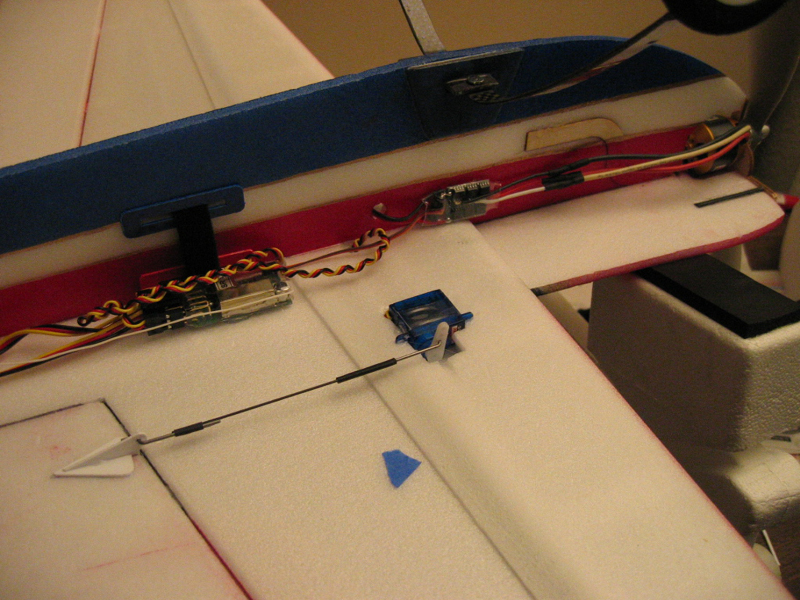 Here is the other side with the radio gear. Note that the blue tape indicates the desired CG range. 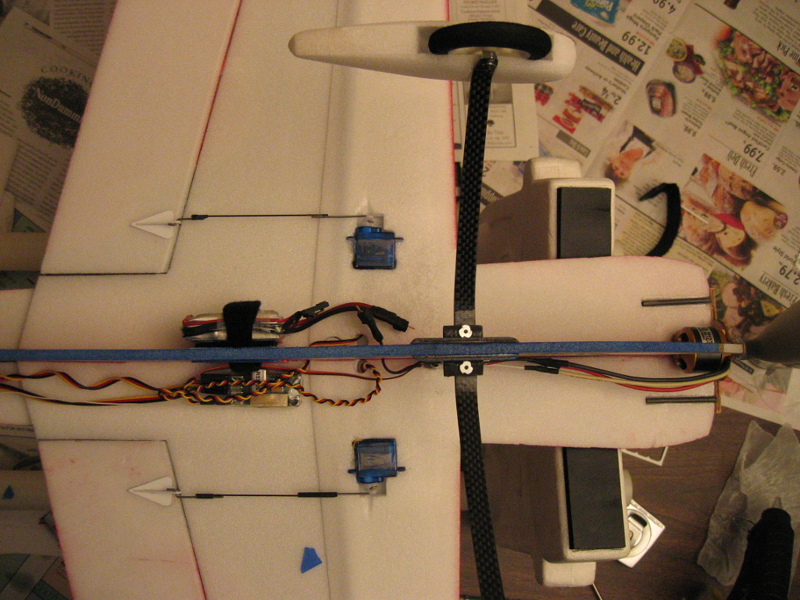 And here is how it all looks in mine.  Now that your all done it's a good time to add the wheel pants, they require some cutting to get the best fit on my setup.I set my CG to 3.5 inches aft of the leading edge by placing the battery ~ 1 cm behind the wing skin trailing edge. . .after which I did my first hover with it. . .sure I was in my room supporting it with my hand. . but it looks like all systems are go once I get new pushrods made!No maiden today though, here is the SAC ASOS (note that right now there is a NWS advisory on the TC that two funnel clouds have touched down near me): Sacramento CA [KSMF] hourly observation on the 21st at 1:53pm PST (2153Z)wind 290° at 18 knots, visibility 1 miles, funnel cloud, thunderstorms with heavy rain, mist, 1,700 feet broken, 5,000 feet broken, 6,500 feet overcast, temperature 15°C (59°F), dewpoint 13°C (55°F), altimeter 29.75 FUNNEL CLOUD B47, automated station with precipitation discriminator, thunderstorms began at 36 minutes past the hour, rain began at 33 minutes past the hour, sea level pressure 29.75" Hg (1007.3 hPa) FUNNEL CLOUD 2SE, continuous lightning cloud-to-ground all quadrants, thunderstorms all quadrants, 0.35 inch (water equivalent) of precipitation in the previous hour, temperature 15.0°C (59.0°F), dewpoint 12.8°C (55.0°F). |
|
|
|
|
Logged
|
S!
TX-EcoDragon
Black 1
|
|
|
|
TX-FlightRisk
|
|
« Reply #39 on: February 21, 2005, 06:05:49 pm » |
|
How often do you guys see funnel clouds out your way???Isn't that unusual as a chicken or emu in this case with lips....\S~TX-FlightRisk "If my plane is smoking it can mean one thing...I have been hit in one of my ass cheeks and I am cauterizing my wound....."
|
|
|
|
|
Logged
|
S~
TX-FlightRisk
"If my plane is smoking it can mean one thing...
Damn gremlins must be stowed away smoking CRACK again....."
|
|
|
|
TX-EcoDragon
|
|
« Reply #40 on: February 22, 2005, 05:12:20 am » |
|
I had a strange thing happen today while I was cycling my batteries inthe plane, the elevator servo simply stopped responding for a second. . . then it came back to life, later on it happened again, this time I tapped the case and it worked. . there is something screwy going on, looks like the maiden will be delayed once again :-/Regarding the tornado. . . you know, they sure aren't common in California, but we had them up here in the Davis/Sacramento area last year too. . pretty strange. Oddly shortly after they touched down the weather got pretty nice today!Oh and about Ladybug. . . I don't know what she was looking at, but from the second floor window seat you can see lots of the local goings on. . enough to keep her entertained when she isn't being fawned over. . .no she's not stuffed yes she moves, in fact look she's standing in one pic and laying down in the others. . .golly. . .:-P
|
|
|
|
|
Logged
|
S!
TX-EcoDragon
Black 1
|
|
|
|
TX-EcoDragon
|
|
« Reply #41 on: February 22, 2005, 11:56:03 pm » |
|
Today I bought a new servo and 6 inch extension since there was something difficult to trace wrong with one of those components. . . I also intended to get the Dubro Micro pushrod system, but after inspection of the dubro rods I see that the thin wire is way too thin for this application unless you used the included plastic sleeve and a guide setup, which I opted not to do. Instead I picked up some .04 carbon fiber rod, some Dubro micro clevis' (for .032 pushrods) and some mini EZ connectors. The CF rod can be glued right into the micro clevis using CA or epoxy (I used CA), and on the other end you can either CA a short length of .032 (or a little larger as .032 is flexy) piano wire for the EZ connector, or perhaps drill out the EZ connector a tiny bit for the CF rod to pass through directly, I tried this last method of using just the carbon rod and a drilled out EZ connector. . . this is a nice clean looking slop free setup that so far seems like a better setup than the included hardware. 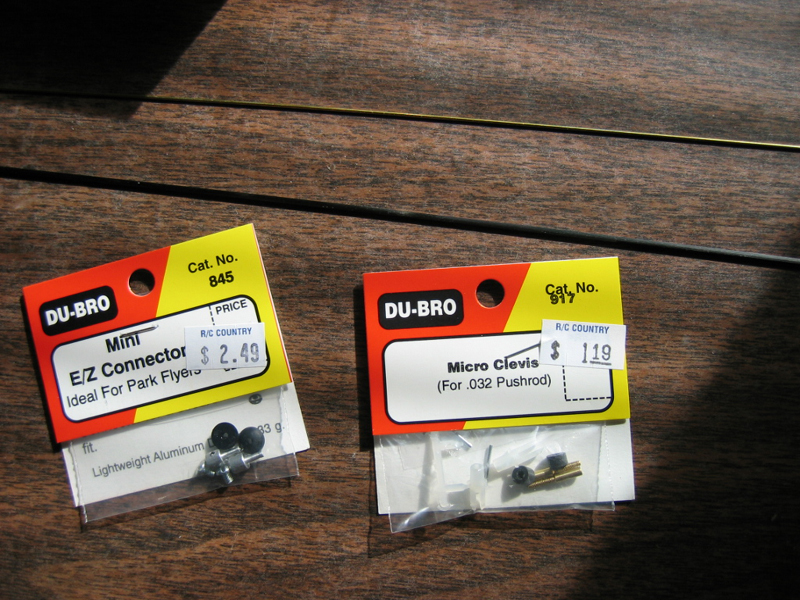 .004 CF rod, Dubro mini EZ conneccectors and microc clevis' 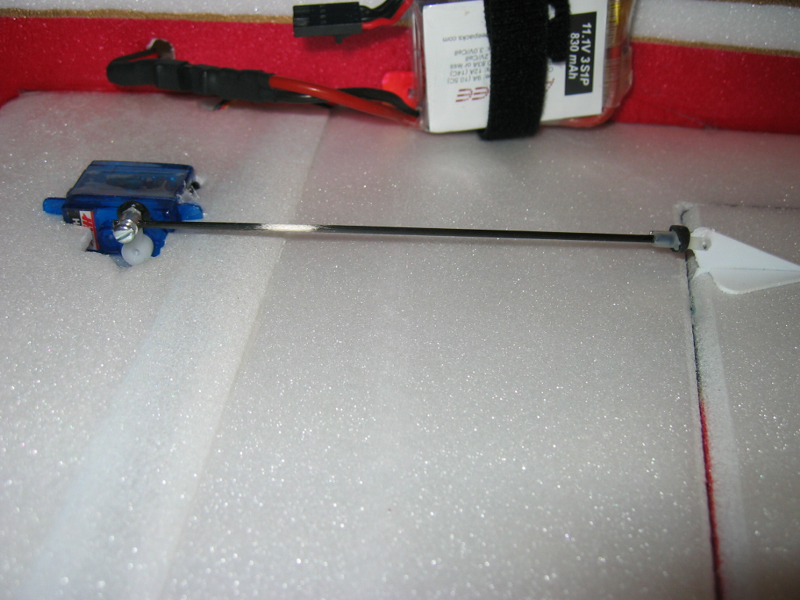 Here they are all finished up, note that I decided to not use any metal in these, I had bought that thin .032 piano wire seen above to CA to the ends of the CF rods, but decided to save soem weight, complexity and the weak point where the metal is glued to the CF. I did have to drill out the EZ connectors but not much at all so this was a 5 second task (Ok 20 total seconds ;-) The micro clevis ends fit perfectly over the CF rod without any effort.  |
|
|
|
|
Logged
|
S!
TX-EcoDragon
Black 1
|
|
|
|
TX-EcoDragon
|
|
« Reply #42 on: February 22, 2005, 11:57:32 pm » |
|
Well, I just got back from the maiden flight, well, two actually! It was sunset and getting dark fast, the park I usually go to had some soccer games going on so I found another one but there was not really any hard surface to land on but I thought I could make do with some shortly cut grass. . . Ben "Hwkmn" was there with me to watch and he got some pics and video though it's all *very* poor quality, he ended up just catching it for me in low hovers to save me form needing to land on the grass or try a spot landing on a 8 foot patch of concrete sandwiched between rows of trees. That worked out well. It was night so the third battery didn't get used. Based on these two flights which came to about 6-8 minutes each I observed the following:On takeoff as I pitched to vertical it kept on pitching up, I needed a lot of nose down trim for level flight (the trim lever is about 75% of the way up) and there was very little pitch stability on the first flight. I had placed the battery near the spot to get 3.5 inches aft of the LE of the wing root. . . but I might have been a little aft of that. . .OK. . it WAS aft of that as I left the wheel pants at home and that was enough to shift the CG back closer to 4 inches Even during the second flight with the battery moved forward a bit most of the nose down trim was still dialed in so it wasn't just a CG issue. I havent yet re-checked the CG on it, but will do that shortly. When the epoxy had cured on the motor mount the thrust line looked like it had a little upward angle to it. . .that could also be the problem, so some shims should fix that up.Roll response was very good, rolls are very axial with no need for differential or rudder, points on point rolls were nice and precise, the shocky was always a little less crisp and you could see it hunting a little as you stopped the points of the point roll. Roll rate was good, and also unlike the Shocky Edge it seemed perfectly content blasting out consecutive high rate rolls, the tail wasn't playing catch-up that I could see, and the plane didn't look like it was about to break! The axial nature of the rolls made them easily sustainable with little rudder or elevator work required to maintain alt and heading, even at high speed and high rate, I bet rolling harriers will be smokin!!I did find that in low speed flight the surfaces all needed more travel than I had allocated to them. 40 degrees of rudder gave good performance but twice I fell out of a torque roll on the yaw axis and couldnt bring the nose vertical very well without adding a lot of throttle to transition from high alpha knife edge back to the hover. The shocky had no trouble with this (but might have had more thow), and I don think this will with another 10 degrees of rudder travel dialed in. This is another point that I might appreciate though, as most of the glow 3D'ers I fly need a little help from the throttle in this too. . .and the shocky gave me a lazy throttle finger that didn't carry over to my other planes very well! I am not a fan of the specialty foam designs that depart too much from conventional flight characteristics of the larger 3D aerobats. . . this seems to blend the big 3D/IMAC glow gas aircraft character with the foamy performance extremely well.This also had a harder time doing anti-torque rolls (to the right) as the ailerons seem to be more shielded from the prop wash than the shocky though I had the aileron travel a little more conservative than it could be. It did them just at a slower rate than I'm used to with the shocky, and in order to get them going I found I needed to blip the throttle to add more propwash over the ailerons. I also noticed that when right at the stall AoA the ailerons lose a lot of their effectiveness so, again, I need more travel to better control it at low speeds. The AXI2212/34 would hold her in a hover at 1 ratchet click above half throttle (time to get a ratchetless heli setup BTW) I am still breaking in my batteries so I didn't go much above that yet, though a few more clicks of throttle and it climbed out with plenty of authority.I didn't want to test for Vne just yet but I did do some high speed downlines and 45s on the second flight with the battery moved forward a bit, and this plane tracked very true with visible stability and smoothness and none of that hunting or twitchiness of the shocky . . .very nice. . .you could probably fly a nice IMAC sequence with this bird!! I might just put my glow aircraft in storage at this rate! Inverted I needed a lot of aft elevator input given the aft CG and this made half rolls a little tricky to get a nice line before and after the roll, but a more forward CG should help there.So in summary:This does not fly like the Shocky. . . it feels like a much larger aircraft. . .it requires a little more attention to proper flying techniques when transitioning from flying on the wing to the harrier/hover attitudes than the shocky did. I needed to pop a little blip of power to help it draw a crisp corner in the pop-ups and if I didn't do that I had to work the rudder a bit to keep the wings level, just like I need to in larger RC planes, and full scale aerobatic aircraft. . . so for me, that is a pleasant surprise. This is probably due to the larger size and weight, and perhaps the unique wing design. It had minimal coupling in knife edge, and what it had was the same left or right wing low which is nice. This probably knife edges better than anything I have ever flown in 21 years, and was a much better torque roller than the shocky is, it pitches up and really locked into the rolls, I could hold it steady rolling with next to no deviations on any axis at all, even with my out of practice thumbs. The shocky always seems to be pitching, yawing, climbing or descending just a little bit in my most stable torque rolls. This was really obvious to Ben and he said he noticed that more than anything that it looked like a much larger plane in the air, it was rock solid in the torque rolls, and that it was very precise and smooth. . .and I agree heartily. I will make some changes tonight, more throws, re-trim the elevator, lower the angle of the thrustline a little ( think its a bit on the + side now) and move the Velcro on my batteries to get a more forward CG, and I will report back again tomorrow. . . so far I am loving it!!!!
|
|
|
|
|
Logged
|
S!
TX-EcoDragon
Black 1
|
|
|
|
TX-EcoDragon
|
|
« Reply #43 on: February 23, 2005, 12:15:50 am » |
|
Well, These pics aren't exactly great, Ben wanted me to hover in front of the moon but his point and shoot didn't like that too much. They are sorta artistic though. . .and they do commemorate the Maiden flight. . .so. . .what the heck, here are a few ( the better ones if ya can believe it ;-) I kinda like the dark pics and how the flash reflected off the gold paint leaving a nice outline of hte Raven, and you can hardly make anyhting else out. . . just the bird!The videos were also kinda poor, and are only from the first few mintues of the very first flight with a very aft CG and a nervous pilot at the sticks (why I get more nervous flying an RC foamy than flying a low point roll over the runway in the full scale Extra is just beyond me . . .but I do!!  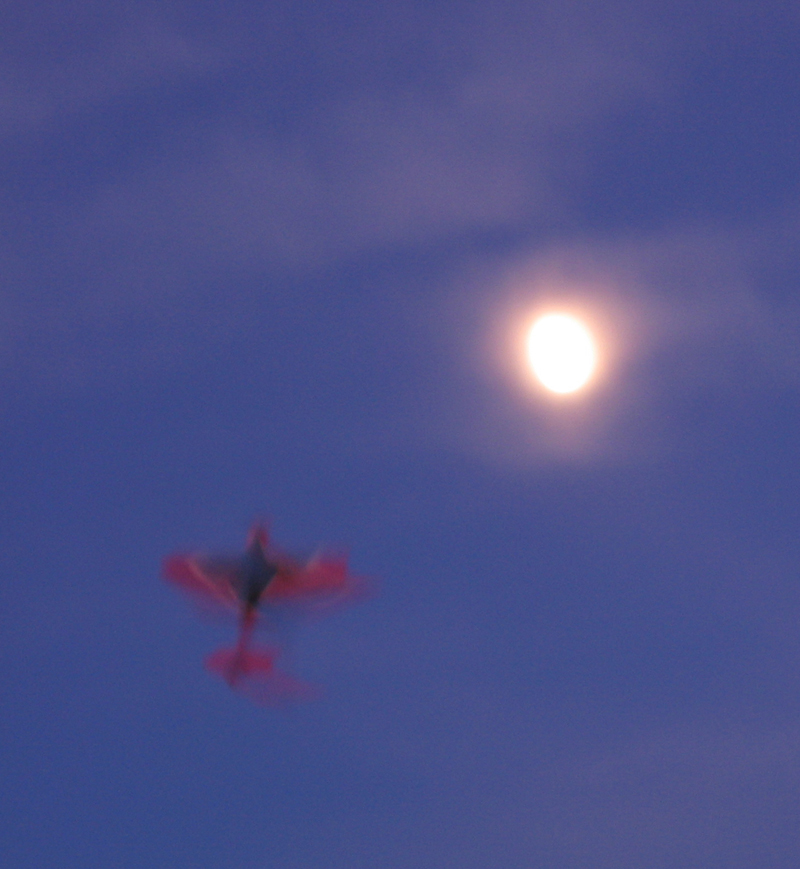  here are the videos, these are better than the pics, but don't expect any great flying. . .or filming for that matter, Ben was watching the flying more than looking through the viewfinder. . .not that I would do any different. It sure was handy having him there to film. . .and he also caught the plane in the hovers so my problem of no place to land was solved. http://ftp://69.56.198.2/Brett's RC Flying Videos/3D Foamy Raven/MVI_0001.AVIftp://69.56.198.2/Brett's RC Flying Videos/3D Foamy Raven/MVI_0003.AVI |
|
|
|
|
Logged
|
S!
TX-EcoDragon
Black 1
|
|
|
|
TX-EcoDragon
|
|
« Reply #44 on: February 23, 2005, 11:43:16 pm » |
|
|
|
|
|
|
Logged
|
S!
TX-EcoDragon
Black 1
|
|
|
|
