|
TX-Deck
|
 |
« on: February 13, 2005, 08:13:52 pm » |
|
Ok, started this project back in the summer of 2003, then shelved it for various misc. reasons. Recently finished all the initial projects on the new house, after fixing up and moving from the old house, and now it is time to get on with the "fun stuff".
This kit is basically an original St. Croix Long-Ez kit, produced back in the 80's. It is a replica of the full scale Long-Ez developed by Burt Rutan, originally marketed as a home built aircraft, to be built by craftsmen around the world in garages and hangers. I'll find a link for more information on the original airframe and post here later on.
I acquired this kit thru a fairly non-standard approach in the hobby, but it worked out well. Long story short, a guy out in Tennessee purchased the rights to market the kit, scammed a bunch of people on RCUniverse.com by offering this kit for free along with a promise of a 1/3 scale "Berkut" version, and then left most people out in the cold. To this day, not a single person actually received a 1/3 scale Berkut. I was lucky and was refunded the price of the entire deal by my credit card company, and ended up with this kit for basically NO COST. I'm happy with the deal, needless to say.
So here we go...
TX-Deck out.
|
|
|
|
« Last Edit: February 13, 2005, 09:58:12 pm by TX-Deck »
|
 Logged
|
TX-Deck out.
|
|
|
|
TX-Deck
|
|
« Reply #1 on: February 13, 2005, 08:25:23 pm » |
|
Your basic wing sheeting...  Sheeting cut to shape and laid out...  Kitchen chair holding the sheets quite nicely...  Foam wing cores encased in extra material left over from cutting...  Foam wing cores in ready to use state, red pen marks minor imperfections and places that needed sanding prior to sending the wings to the "press"...  TX-Deck out. |
|
|
|
|
Logged
|
TX-Deck out.
|
|
|
|
TX-Deck
|
|
« Reply #2 on: February 13, 2005, 08:37:28 pm » |
|
In order to adhere the sheeting to the foam cores, it is desirable to apply even pressure across the entire wing while the glue sets up. This can be done by applying weights such as paint cans, lead shot in socks, weightlifting weights, etc.... but the "cool" way to do this is to use a wing press. Take two boards, drill holes for bolts in several uniform places, and secure with wingnuts. Once the sheeting and foam core are in lined up properly, screw down the nuts and let it sit overnight. Works great! (I think these pics may be a repost, sorry about that...)Wing press top-down view... 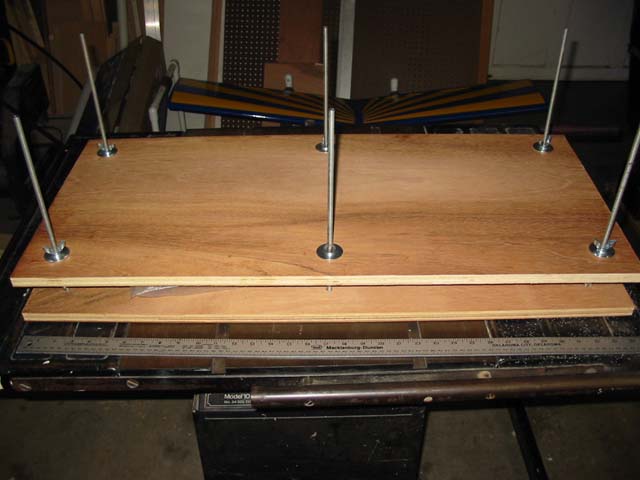 Threaded rods and wingnuts...  Balsa sheeting and foam core being fastened together with Gorilla Glue (strong stuff!)... 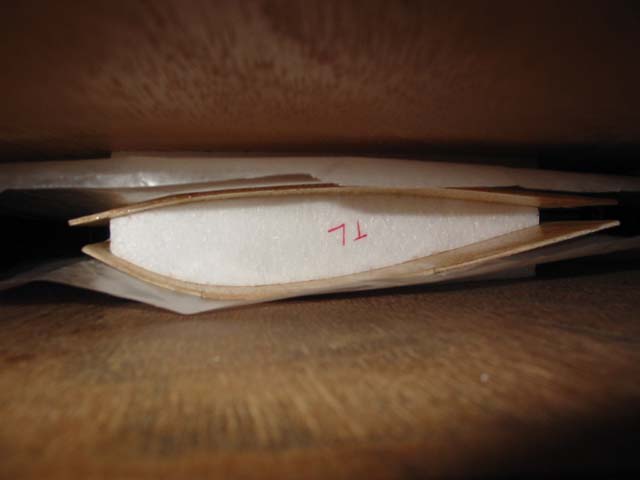 TX-Deck out. |
|
|
|
|
Logged
|
TX-Deck out.
|
|
|
|
TX-Deck
|
|
« Reply #3 on: February 13, 2005, 08:42:51 pm » |
|
The wing is assembled in six parts, then these are attached together after all sections have been sheeted and the glue has dried.    TX-Deck out. |
|
|
|
|
Logged
|
TX-Deck out.
|
|
|
|
TX-Deck
|
|
« Reply #4 on: February 13, 2005, 08:53:27 pm » |
|
Center sections ready to be attached together...  Reinforced center pieces being glued down... (yes, I made that jig that the clamps are attached to, only to realize later that the clamps are reversible and can be used to spread instead of clamp... DOH!)  Three views of the assembled wing cores...    TX-Deck out. |
|
|
|
|
Logged
|
TX-Deck out.
|
|
|
|
TX-Deck
|
|
« Reply #5 on: February 13, 2005, 09:25:28 pm » |
|
Ok, everything previously posted in this thread was done back in the summer of 2003, and the project has been on hold since that time. The dust has settled in the new house and it is time to pick back up where I left off. After seeing Eco blast thru the build of his new 3D Foamy Raven, I decided to get out in the garage this morning and clear everything off the bench and introduce the world to my new..."Weapon of Mass CONSTRUCTION"  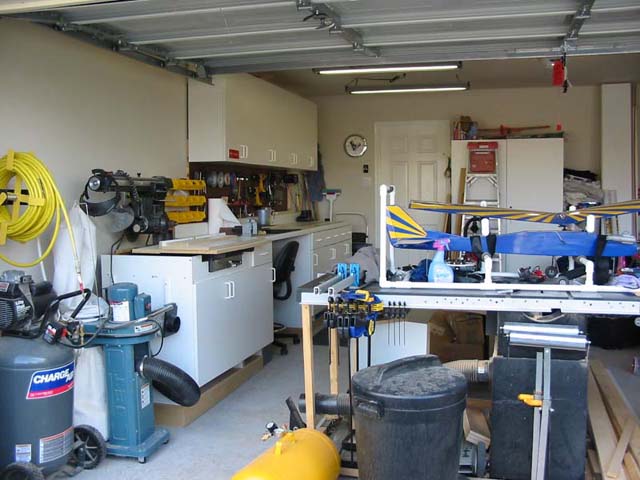 Here's the wing getting acquainted to the new surroundings... 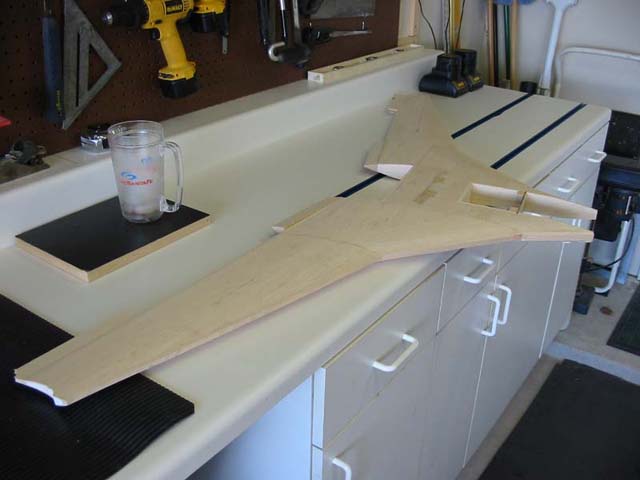 Discovered a little bit of hanger rash from attic storage over the last year-and-a-half... 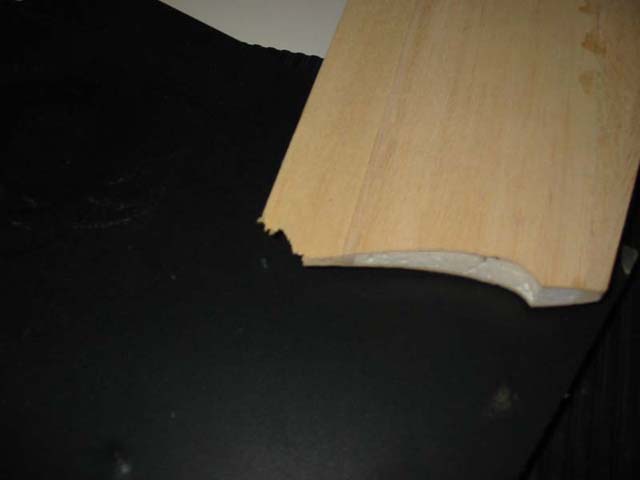 More to come in the next few weeks, check back for updates soon!TX-Deck out. |
|
|
|
|
Logged
|
TX-Deck out.
|
|
|
|
TX-EcoDragon
|
|
« Reply #6 on: February 13, 2005, 11:40:09 pm » |
|
That's gorgeous. . . lotsa work no doubt, but a labour of love I'm sure. . . and it's paying off!!S!TX-EcoDragonBlack 1TX-Squadron XO
|
|
|
|
|
Logged
|
S!
TX-EcoDragon
Black 1
|
|
|
|
TX-Deck
|
|
« Reply #7 on: February 22, 2005, 10:04:26 pm » |
|
Worked a little this weekend when I had some spare time, and accomplished several boring but necessary tasks...The spars for the winglets had to be inserted in each wingtip, and at this point I realized that the foam was not precut to make room for the spar... Uh Oh! 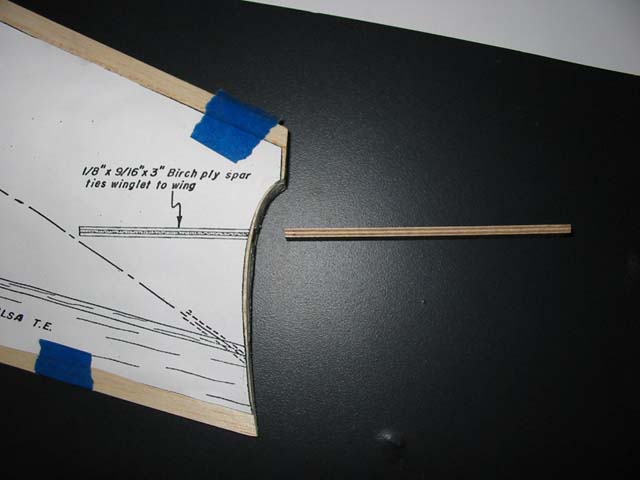 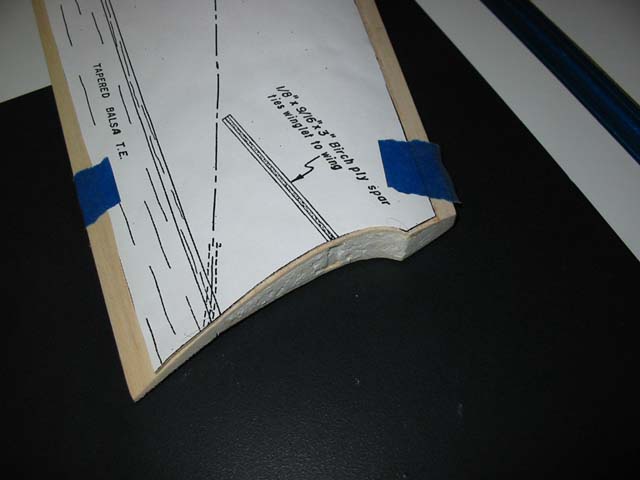 So there needs to be a 1/8" gap about 2.5 inches long down into the wingtip. The only slick way I can think of hollowing out the area is to make a new tip for my soldering iron, and melt it away... 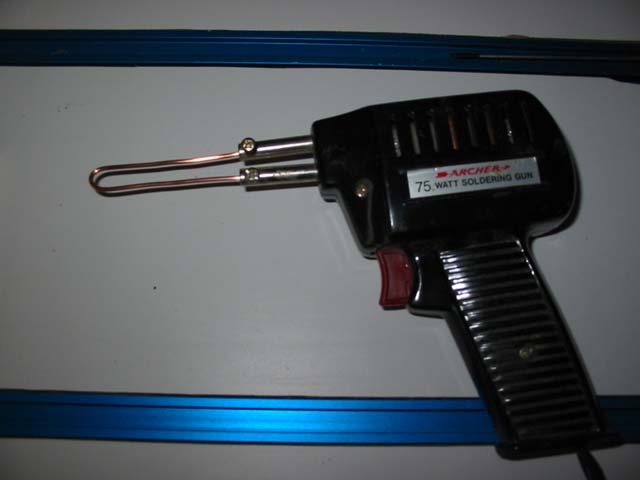 Ummmmm, worked a little too good... but no need to worry, this can actually play to my advantage, providing a little more area for the epoxy to fill and strengthen the structure... 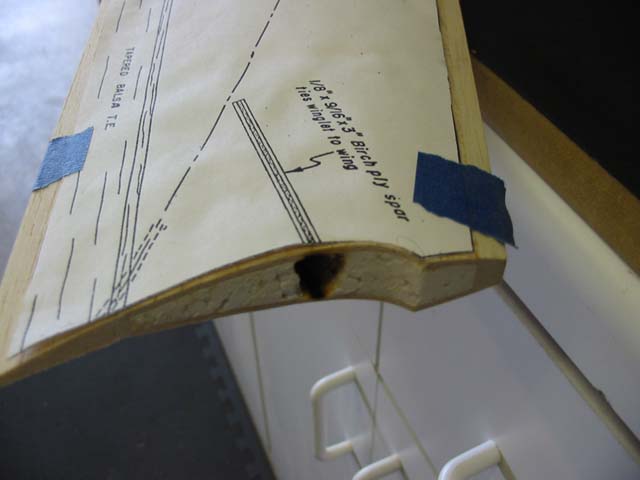 TX-Deck out. |
|
|
|
|
Logged
|
TX-Deck out.
|
|
|
|
TX-Deck
|
|
« Reply #8 on: February 22, 2005, 10:06:17 pm » |
|
Here is one spar inserted and secured with epoxy... worked out just fine!  TX-Deck out. |
|
|
|
|
Logged
|
TX-Deck out.
|
|
|
|
TX-Deck
|
|
« Reply #9 on: February 22, 2005, 10:08:15 pm » |
|
The hanger rash was really starting to get at me, so I decided to tackle that task second... you can actually see the result if you look at the previous picture up above. (Betcha didn't even notice, did ya?)Here's a shot of a nice clean square section being removed, and then a new chunk of balsa being set in with epoxy to replace the ding...  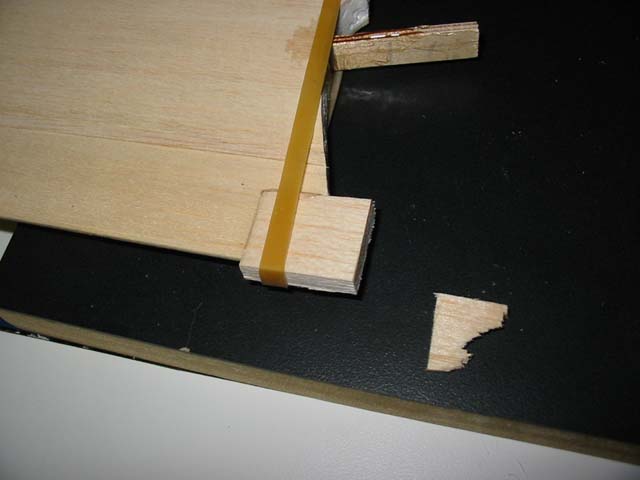 After a little sanding, viola! Just like new... The entire wing structure will be coated with multiple layers of fiberglass and then painted, so nobody will know the better, except for us...  TX-Deck out. |
|
|
|
|
Logged
|
TX-Deck out.
|
|
|
|
TX-Deck
|
|
« Reply #10 on: February 22, 2005, 10:15:44 pm » |
|
The next step is probably one of the more enjoyable things for me when constructing a new wing. I really like to see a balsa trailing edge take shape. The inboard trailing edge is created from a very oversize piece of triangular balsa stock, and therefore needs to be sanded... and sanded... and sanded some more, until it is flush with the upper and lower surfaces... 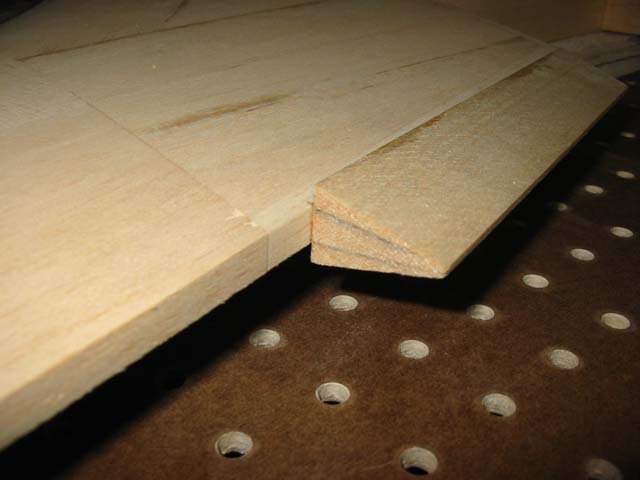 Here is another section, sanded very close to done at this point... 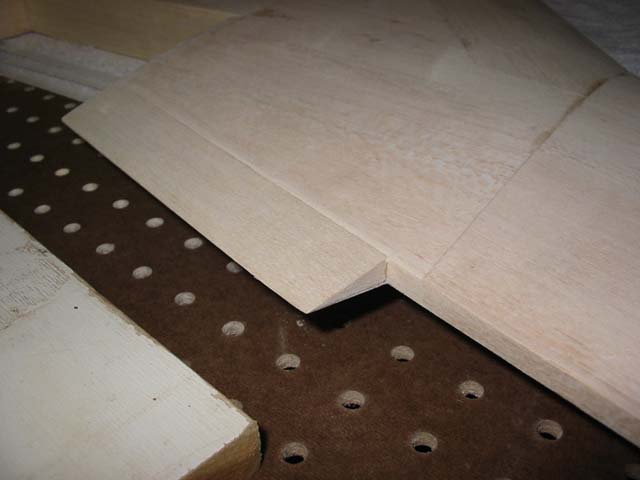 Next up is Aileron construction. After a quick consult with Eco the other night, I've finalized the idea I had in mind for some slick looking hinge gaps, and i'll post pics as soon as I have a chance to work on them some more.TX-Deck out. |
|
|
|
|
Logged
|
TX-Deck out.
|
|
|
|
TX-EcoDragon
|
|
« Reply #11 on: February 22, 2005, 10:36:41 pm » |
|
Golly. . that sure is cool. . . I love the full scale EZ and Berkut, and with how rare they are in full scale and even rarer in RC form you will no doubt garner much attention from onlookers!! It already is looking great. . . I can't wait!One of these days I guess I should come out to Texas. . . but I'll have to wait till ya get done with that first ;-)S!TX-EcoDragonBlack 1TX-Squadron XO
|
|
|
|
|
Logged
|
S!
TX-EcoDragon
Black 1
|
|
|
|
TX-Bomblast
|
|
« Reply #12 on: February 22, 2005, 11:33:15 pm » |
|
Very nice work, Im sure it's going to look great. BTW, where did you find those sheet metal style wing nuts?White6
|
|
|
|
|
Logged
|
|
|
|
|
TX-Deck
|
|
« Reply #13 on: March 03, 2005, 08:15:16 am » |
|
Bomblast, sheet metal wing nuts were found at the local Home Depot in the "special parts" bins, if memory serves me correctly.I've done a little work on the ailerons this past week, should be able to post more photos later this weekend. Stay tuned....TX-Deck out.
|
|
|
|
|
Logged
|
TX-Deck out.
|
|
|
|
TX-FlightRisk
|
|
« Reply #14 on: March 03, 2005, 06:39:51 pm » |
|
Wow, Great work Deck!!S~TX-FlightRisk "If my plane is smoking it can mean one thing...I have been hit in one of my ass cheeks and I am cauterizing my wound....."
|
|
|
|
|
Logged
|
S~
TX-FlightRisk
"If my plane is smoking it can mean one thing...
Damn gremlins must be stowed away smoking CRACK again....."
|
|
|
|
